Review – Luke’s Toy Store Ninja Decal Kit
I’ve seen Minimates a few times but it was only recently, after checking out Minimate Headquarters a few times, not to mention the announcement of the upcoming Battle Beast Minimates and the Lab Playset (mentioned here), that I became interested enough in Minimates to pick up a couple of packs. Neat, fun little toys with a great design, actually playing with a few different Minimates made me understand why they’ve grown so popular over the last few years.
Popular enough, in fact, that we’re now getting custom Minimates decal sets from Luke’s Toy Store, an online store devoted to Minimates. Luke was kind enough to ship me a review copy of his first set — Ninja Decal Kit — as well as three blank Minimates so that I could test out his new creation.
Neat stuff!
Packaging
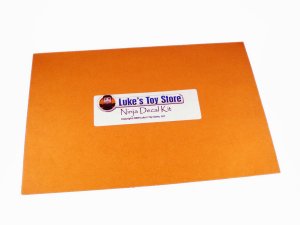
None to speak of, really. The decal sheets and instructions come packed in a plain envelope with a sticker to let you know what’s inside. As you guys know the packaging means a lot to me but I can see where Luke was trying to concentrate on what he was actually offering and not the packaging so this is acceptable. Not exciting, but for $5 for the decal kit (an awesome buy) I think we can let this dull packaging slide.
I do hope that Luke becomes successful enough at this that he can graduate to custom-printed envelopes or even ziplocks with header cards. Some photos of the decals in action would make the packaging a hell of a lot more attractive.
Decals
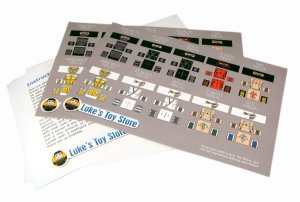
The photo above shows the two identical decal sheets (ten figure designs on each sheet) as well as the included instruction sheet and list of suggested Minimates figures to use with these decals. The decals are professional in every way, from the clean artwork to the actual production of the decal sheets. I don’t know if you can buy decal sheets to run through a home printer or if Luke took these out somewhere and had them professionally printed but they’re fantastic.
I’m assuming that there’s some decal paper out there somewhere, though, because this page at Minimate Factory has several decal designs you can download and print on your own. I’m betting that some digging over at The Minimate Factory, a site devoted to customizing these little guys, will lead you down the right path.
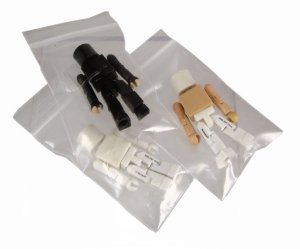
Luke was kind enough to ship me three blank Minimates so that I’d have figures to test the decals on. After looking over the figures and the included designs, and taking a peek at the decals Poe Ghostal selected for his review of this decal set, I settled on mixing up some of the parts and decals to create two different ninja figures. This left me with a spare, mismatched figure but I’m willing to bet that guy will get his turn in the future since I now have an interest in customizing Minimates.
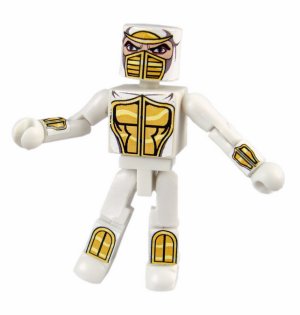
Armored Ninja (White)
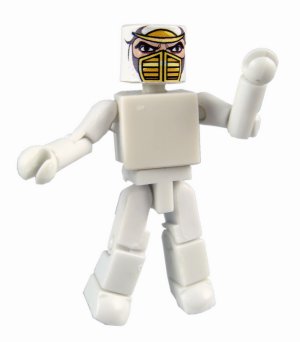
This guy, shown above after the very first decal was applied and below after all of his decals were applied, is the design exactly as Luke intended it. The white decals were very easy to use; all I did was cut them out, soak them in water, and then carefully apply each one to the appropriate part on the blank white Minimate. I think it took a total of about ten minutes to apply all of the decals to this guy and after about an hour later he was safe to handle.
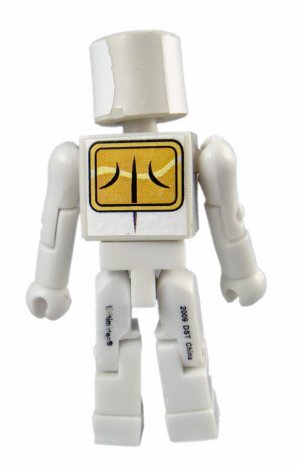
The white decals on white body worked perfectly, without any weird edges or seams. The photo below, showing the figure from behind, illustrates the one oddity; the white decal isn’t the same as the white body so the back of the head looks a little odd. I’m betting that a talented modeler could use a little paint to smooth out the edges, but it only looks strange when you stare closely at the figure and, even then, only from behind. This is a non-issue for me since I’m not likely to play with these guys too much; I’d hate to rub the decals off of the bodies.
Fire Ninja
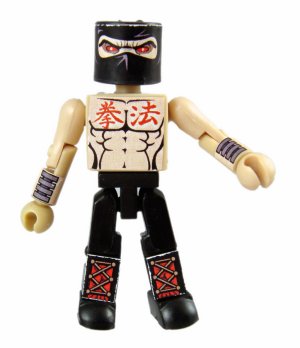
For the second figure I took apart two of the blanks and assembled them so that I had black legs and head and flesh-colored chest and arms. I then used the upper body decals from the Fire Ninja design along with the lower leg decals for the Demon Ninja design. The effect worked perfectly (but now I want a red body so that I can create a Demon Ninja).
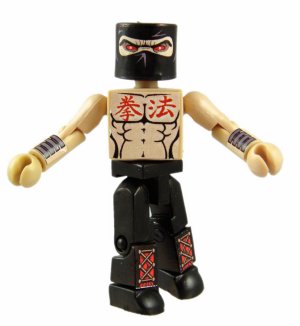
Well, almost perfectly. In the photo above you can see white jagged edges around the black decals. It’s ugly, but a few minutes with a Sharpie had those ugly edges completely covered and my Fire Ninja looking just as cool as my Armored Ninja. The instructions suggest that using a hobby knife will reduce the effect of the white edges on black decals, or you can paint those edges after the decals dry, but I found that the Sharpie worked perfectly.
You can see the results of my Sharpie work in the photo below.
Closing Thoughts
I was a little skeptical when Luke contacted me about reviewing this decal set, but now that I’ve had a chance to follow the instructions and customize two Minimates of my own I’m happy that Luke took the trouble to ship me a set. Clean artwork, professional printing, and easy-to-follow instructions all came together to make this a fun project that gave me my first taste at customizing Minimates.
If you’re a Minimates fan then you should take a closer look at this set over at Luke’s Toy Store. $5 is cheap for this level of quality and for this many sets of decals. As long as you’ve got the blanks for it you can create a total of 20 figures out of this one set; that’s a quarter for each set.
I look forward to seeing what Luke comes up with next. I hear ghosts are the next project.
Check this post at Minimate Headquarters for the announcement of Luke’s Toy Store and this decal set.
Philip Reed is gonna grab more Minimates sets as time goes on. He knows this, admits this, and finds it easier to just accept that fact than to just keep pretending he doesn’t like Minimates.

Thanks for reviewing these! Luke also does some awesome custom work on minimates too. These look really cool and simple to use.