Guide – Cleaning Photos for Toy Reviews
Since I first launched battlegrip.com I’ve had several favorable comments on the photos that I include with the various toy reviews at the site. A few e-mails and calls have been especially flattering, and today I’d like to share with you guys the tools and process that I use to snap pics for the site. This is gonna sound complex and expensive, but if you follow along you’ll find that there are more than a few free and inexpensive tricks you can use to get similar effects that I get using Photoshop and a light tent.
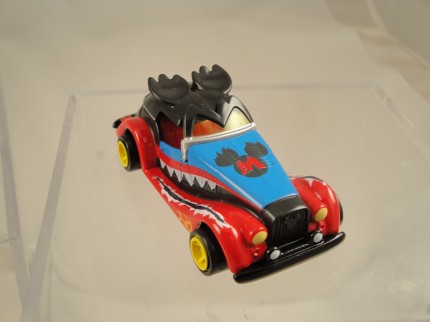
Your Basic Photo
Above, you can see our subject for this short guide. I use a basic light tent and two photography lights (search “light tents” at Amazon.com*) with a white backdrop. I also use a couple of small clear photo frames to set the toys on; this is so that when I use the macro setting on the camera I don’t pick up the tight weave of the cloth. I found that raising the toy above the cloth blurs out the weave enough to make later steps much easier.
Instead of a light tent you can also use standard lamps directed away from the toy and a white sheet or white sheets of paper. The light tent is easier to use, but it’s not tough to fake it. You don’t have to get a perfectly white background in your photo; that’s what the editing steps are for.
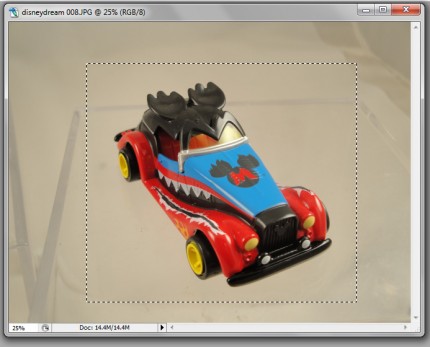
I use a Sony Cyber-shot DSC-W290* on macro setting to snap the photos and always take three photos of the same angle/scene. This is so that I have options when I pull the images into Photoshop for editing. The image above shows how I crop the image so that we get a tighter look at the subject of our shot. If you don’t have Photoshop, and don’t want to spend the cash, you can edit your images with Gimp (official website), a free program that will do everything you need to to follow the steps I use.
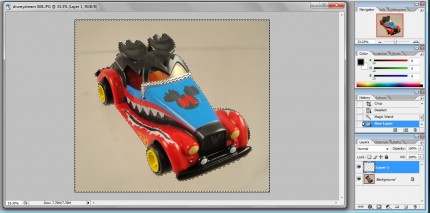
Selecting the Toy
This takes a few steps, but each one is quite easy. First, use the magic wand tool to auto-select the background. I do this by clicking on a background spot and then holding down the SHIFT key and clicking again and again as necessary until the toy is almost completely isolated. Your selection won’t be perfect, but we can clean it up easily.
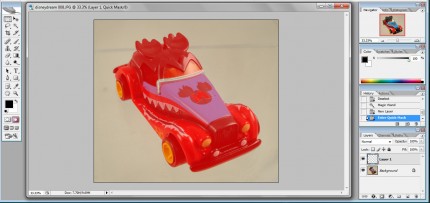
After using the magic wand I create a new layer and then change over to the Quick Mask. That’s what gives the toy the reddish coloring you see. Then, zooming in to 200% and using a hard and small brush, I check every outer edge of the toy and draw in along the edges. This only takes a ridiculous amount of time when your toy is white or has a lot of pale and shiny spots.
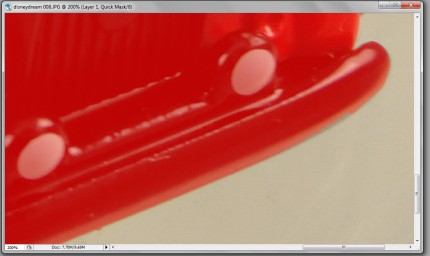
The image above and below should give you an idea of how this works. This particular image should have taken about a minute for this step, but since I was capturing screenshots the process took more like three minutes.
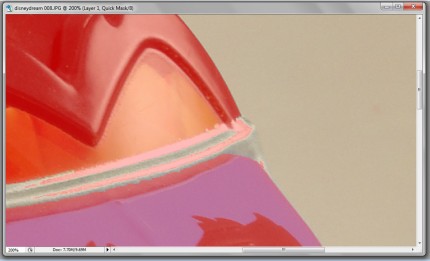
Next, using the magic wand tool, I select the highlighted area and inverse the selection then hit DELETE. This is to clear any spots outside of the toy. We want everything that isn’t toy to be completely empty so that when we’re ready to fill with white none of the background shows through.
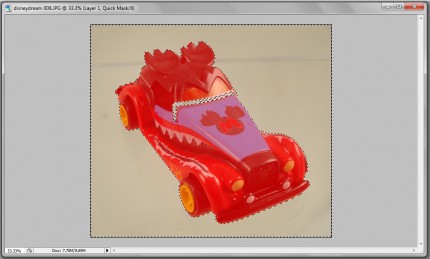
Then I use the magic wand to again select the background and invert the selection so that I can fill the toy with “black” . . . which will look red in the Quick Mask mode. Once that’s done then ONLY the toy should have the reddish selection.
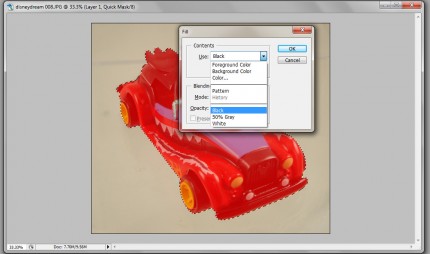
And now we turn off Quick Mask mode which leaves the background selected and the toy unselected.
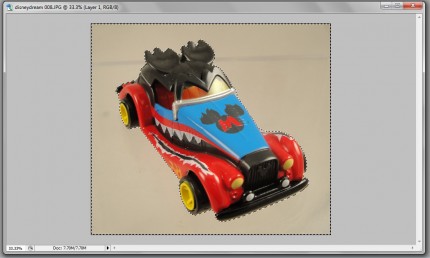
A quick fill of the selected area with white and we’re getting close to done.
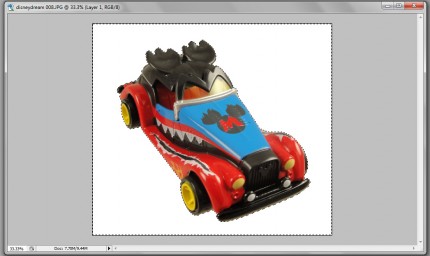
The last step in making the background white is to duplicate the white layer and run a slight gaussian blur on the duplicated layer and then drop the opacity on the duplicated layer. This helps soften some of the edges. It’s subtle, but I think this step is worth the effort.
Tweaking the Colors
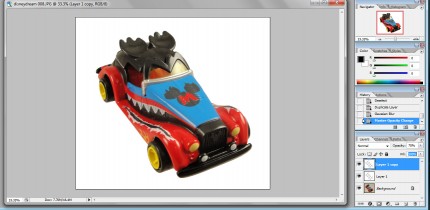
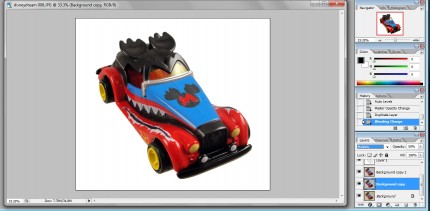
Next I duplicate the layer with the photo and run Auto Levels to enhance and brighten the colors. This goes too far, though, so I screen the modified layer back — usually to 50% opacity — which helps. But it’s not perfect so . . .
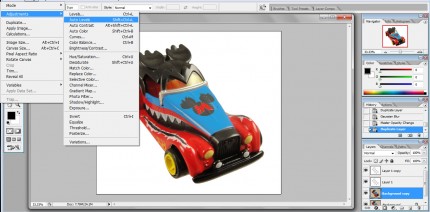
. . . I duplicate the 50% opacity layer. Then, the photo layer in the center — the first duplicate — I set to “Multiply.” That makes the colors look closer to the toy and makes me happy. I’ve experimented and sometimes use other opacity settings, but 50% seems to almost always work. It’s also pretty fast and easy to do these steps.
Flatten and Done
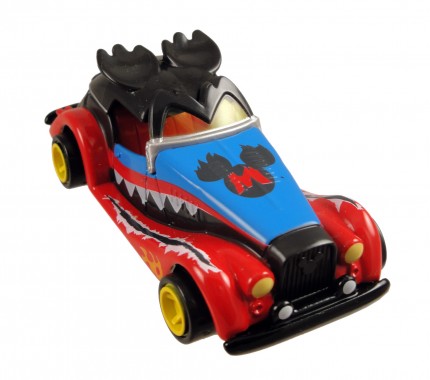
Below you can see the final image. To make comparing the final to the original I have included another copy of our base photo beneath the cleaned image. I think you can tell the difference between the two images. And I hope that you find this quick guide to how I handle the photos at least a little useful.


Awesome tips, thanks!
You’re welcome! I hope you get some use out of the post.